I recently acquired some of the cutest Vintage kitty and puppy scraps via the bay.
I couldn't open this package fast enough when it came in, and immediately sat down and sewed up this sweet little accent pillow!
After fussy cutting one of the kitties, I added some Maywood Studios vintage inspired prints, and finished it with vintage trims
It will be for sale in my facebook group here and a new favorite here
Until next time!
Michelle
Showing posts with label home decor. Show all posts
Sunday, July 22, 2018
Saturday, December 7, 2013
An oldie, but goodie, Junky snowman ornament tutorial
I posted this 2 years ago, but thought it was time to share it again, just in time to adorn your Christmas tree!
Haaaaaapy Birthday!!
No..It's not my birthday, nor is it my blog's birthday, but when I finished these cute ornaments I immediately thought of good Ole Frosty the Snowman, and the first words he utters when he comes to life.
I'm going to tell you how you can make your very own!
For those of you who don't know me, one of my favorite places, (besides Thrift Stores, Antique malls and craft stores lol) is the hardware store. Now normally, you'll find me shopping at Home Depot, BUT Here lately I've discovered that the Menards 20 minutes away actually has about 3 times the selection (*Gasp* I know, Right?) and is actually quite a bit cheaper (Sorry HD...I still love you though!!) So while Hubby and I were out for a rare date night (Endless Shrimp anyone?!?!) we popped into the Lancaster menards to look for smaller packs of peg board hooks (which they had..Menards 1 - HD 0) and some lazy susan hardware at a reasonable price (Menards 2 - HD 0) and while standing there looking at their unbelievable selection of hex nuts (once again, menards scores..3-0, menards' game) I was inspired. I just happened to see them in my head, Hardware snowmen! and you really can't beat the prices! I got enough hex nuts to make 6 snowmen and it was a whopping $4.42..including tax. Except the wire, I had that already, and it was purchased at Home Depot.
24 gauge wire
E600
snowman body:
5/8 hex nuts
1/2 hex nuts
3/8 hex nuts
Hat
1/4 flat washer
2 1/4 hex nut OR 1 1/4 hex and 1/4 hex cap
Extra 1/4 hex nuts or beads/bells
1: set a 5/8 hex nut on your working surface.
2: spread some E600 on one side of the 1/2 hex, place it, glue side down, onto the 5/8 hex.
3. repeat for the 3/8 hex.
4. on wrong side of the flat washer put some E600, place it onto the 3/8 hex
6. repeat for second 1/4 hex or hex cap.
7. set aside to dry
8. While snomen are drying, cut your wire into 5-6" pieces. Bend in half
9. half way down from the loop you formed in step 8, tie the wire into a loose knot. this can be done, it just takes a minute to work it into the right shape.
10. Slide your hex/bead/bell on 1 strand of wire. twist both strands together locking the bead onto the wire.
11. wrap extra wire up and around the top of the bead, this will be hidden between the snowman's hat and the bead.
12: thread the flattened loop throught the hex nuts and out the top of the snowman's hat. spread wire loop for hanging. and Voila! A hex nut snowman!
Haaaaaapy Birthday!!
No..It's not my birthday, nor is it my blog's birthday, but when I finished these cute ornaments I immediately thought of good Ole Frosty the Snowman, and the first words he utters when he comes to life.
I'm going to tell you how you can make your very own!
For those of you who don't know me, one of my favorite places, (besides Thrift Stores, Antique malls and craft stores lol) is the hardware store. Now normally, you'll find me shopping at Home Depot, BUT Here lately I've discovered that the Menards 20 minutes away actually has about 3 times the selection (*Gasp* I know, Right?) and is actually quite a bit cheaper (Sorry HD...I still love you though!!) So while Hubby and I were out for a rare date night (Endless Shrimp anyone?!?!) we popped into the Lancaster menards to look for smaller packs of peg board hooks (which they had..Menards 1 - HD 0) and some lazy susan hardware at a reasonable price (Menards 2 - HD 0) and while standing there looking at their unbelievable selection of hex nuts (once again, menards scores..3-0, menards' game) I was inspired. I just happened to see them in my head, Hardware snowmen! and you really can't beat the prices! I got enough hex nuts to make 6 snowmen and it was a whopping $4.42..including tax. Except the wire, I had that already, and it was purchased at Home Depot.
So here's your Shopping list:
E600
snowman body:
5/8 hex nuts
1/2 hex nuts
3/8 hex nuts
Hat
1/4 flat washer
2 1/4 hex nut OR 1 1/4 hex and 1/4 hex cap
Extra 1/4 hex nuts or beads/bells
1: set a 5/8 hex nut on your working surface.
2: spread some E600 on one side of the 1/2 hex, place it, glue side down, onto the 5/8 hex.
3. repeat for the 3/8 hex.
4. on wrong side of the flat washer put some E600, place it onto the 3/8 hex
5. repeat for 1/4 hex
7. set aside to dry
10. Slide your hex/bead/bell on 1 strand of wire. twist both strands together locking the bead onto the wire.
11. wrap extra wire up and around the top of the bead, this will be hidden between the snowman's hat and the bead.
12: thread the flattened loop throught the hex nuts and out the top of the snowman's hat. spread wire loop for hanging. and Voila! A hex nut snowman!
If you make one, please let me know, I would love to see them!
Thursday, September 6, 2012
A new look for Jan
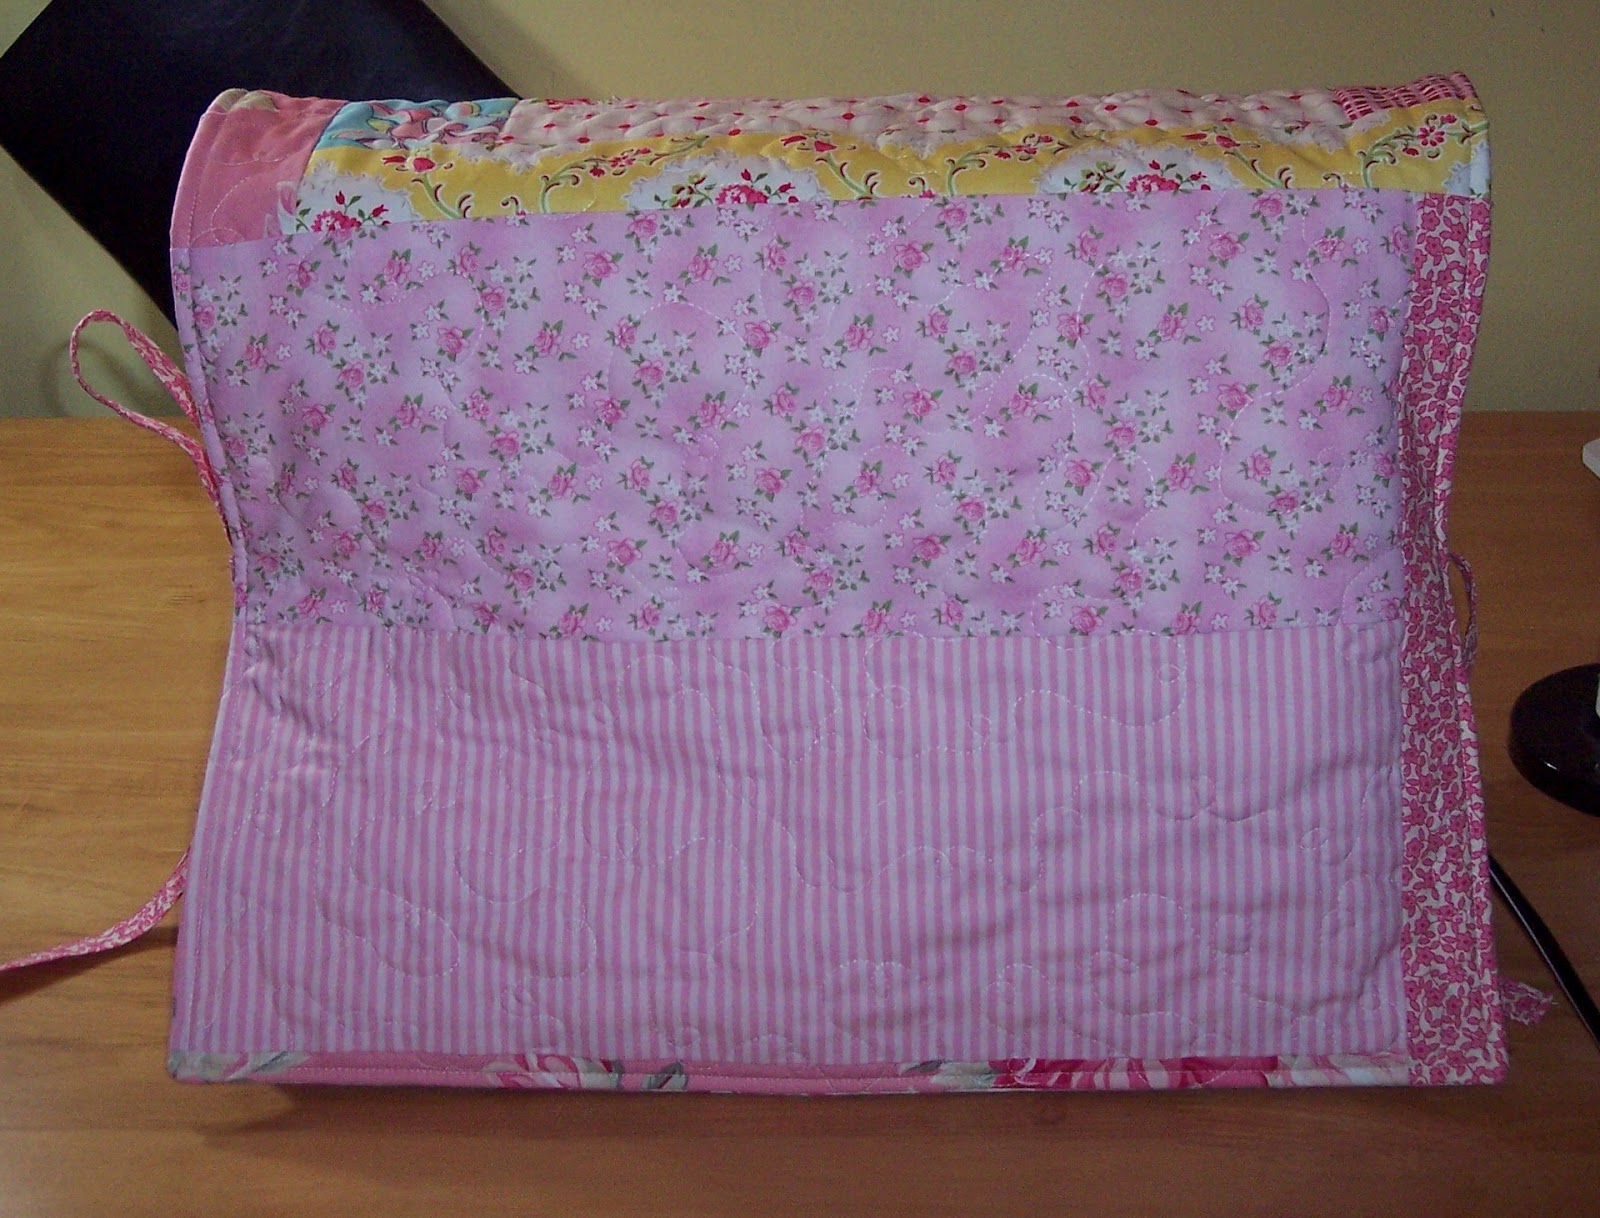
Today I thought I would share a little project I whipped up last night as part of my new-old sewing room makeover,
I didn't use a pattern or tutorial for it, although I have seen these type of covers many times in blogland.
I started with a line drawing of a dress form, which you can find here. You can use a transfer pencil, or do as I did and just lay the drawing under my white fabric and trace it. Then, using 3 strands of embroidery floss for the form, and 2 strands for the stand, I used a simple backstitch to stitch out the drawing.
After the embroidery piece was finished I just cut and added fabric pieces in a log cabin style manor until I had a large enough block for the front of my cover. For the back of the cover, I pieced together some large scraps. After sewing both sides of the cover together, I pressed and pinned it to my batting. Since I didn't plan to use a binding, I quilted the top of the cover to the batting only.
I added some ties and a pretty backing. Sewed them together right sides facing, leaving a hole for turning. Clipped my corners, turned and top stitched around the entire outside edge, closing the hole with the top stitching.
Tied it on, and just that easy, Jan has a new reversible cover for when she's not in use!
Stay tuned for more projects as I work on redoing my sewing room!
Linking up to these parties!
Handmade 52
Craftastic Monday
I didn't use a pattern or tutorial for it, although I have seen these type of covers many times in blogland.
I started with a line drawing of a dress form, which you can find here. You can use a transfer pencil, or do as I did and just lay the drawing under my white fabric and trace it. Then, using 3 strands of embroidery floss for the form, and 2 strands for the stand, I used a simple backstitch to stitch out the drawing.
After the embroidery piece was finished I just cut and added fabric pieces in a log cabin style manor until I had a large enough block for the front of my cover. For the back of the cover, I pieced together some large scraps. After sewing both sides of the cover together, I pressed and pinned it to my batting. Since I didn't plan to use a binding, I quilted the top of the cover to the batting only.
I added some ties and a pretty backing. Sewed them together right sides facing, leaving a hole for turning. Clipped my corners, turned and top stitched around the entire outside edge, closing the hole with the top stitching.
Tied it on, and just that easy, Jan has a new reversible cover for when she's not in use!
Stay tuned for more projects as I work on redoing my sewing room!
Linking up to these parties!
Handmade 52
Craftastic Monday
Monday, July 2, 2012
They had me at Granny square
I love, love, love granny squares, which just about figures as my Mom (who is the crocheter in the family) hates to make them, so, I have none :( That is, until I discovered this tutorial!!
This is my all time favorite quilt block. Seriously, I can't wait to make more!
I tried it out last night and made these 2 blocks
This is my all time favorite quilt block. Seriously, I can't wait to make more!
I tried it out last night and made these 2 blocks
The blue and yellow is going to be put aside to be used in a project for me, I'm just trying to decide between a table runner, another pillow cover, or..a couch snuggling quilt.
While I was already sewing binding, I grabbed another project that has been just laying about waiting for me to finish it's binding too. I made this pillow cover last November/ early Dec, but as usual, since it was a personal project, it got put on the back burner. But it's finished now and will be put to use this Christmas :)
Monday, June 4, 2012
yumm...
Doesn't this just look soooo yummy? It's very simple, I just sliced up some granny smiths, strawberries, bananas. then tossed in some Blackberries and green grapes.
After I put them into the fridge to keep them chilled, I mixed up an angel food cake mix (from a box- Gasp! lol) and baked it up..
Slice, top with the fruit salad and a dollop of sugar free whipped topping. SO refreshing and light for a hot summery day!
Today I started on my plan to exercise everyday, and it's going to be hard. but I am tired of being overweight and I need to strengthen those muscles, or my back and neck is only going to get worse.
Also today I started a couple of projects that have been building up in the garage, Up first is this old solid wood panel door I picked up off the curb. Look at this hardware: The knob plate on this side of the door is pretty rusty, but I love the details. The hinges were just as nice, I've saved them for another project sometime down the road. The door is part of a larger project coming up.
Also up is this rocking chair. This was a Craigslist find last summer, I bought it just as you see (minus the aqua paint) and it will be getting a total overhaul as well.
I almost forgot to get a before picture of it! Fortunately I didn't get too far before I remembered.
Tomorrow is another day and I hope to get these projects closer to completed.
Labels:
Before and after,
crafting,
crafts,
Decorating,
designing,
dessert,
diet,
DIY,
eating,
food,
fun stuff,
Furniture,
home decor,
painting,
recipe,
Refurbishing furniture,
repurposing,
upcycle
Friday, December 23, 2011
Last minute gifts that have a personal touch!
Need a quick, easy and inexpensive Christmas gift?
Walmart has some great holiday towels on sale for $.98.
With about 20 mins.,a little applikay wonder (or wonder under) some coordinating fabric and your zig zag stitch on your machine turns these towels into a personalized gift!
FOr these ones I cut out a poinsettia from some fabric..
And these were just some free hand trees..
Easy peasy, and cute as can be :)
Till Later!
Michelle
Walmart has some great holiday towels on sale for $.98.
With about 20 mins.,a little applikay wonder (or wonder under) some coordinating fabric and your zig zag stitch on your machine turns these towels into a personalized gift!
FOr these ones I cut out a poinsettia from some fabric..
And these were just some free hand trees..
Easy peasy, and cute as can be :)
Till Later!
Michelle
Tuesday, October 4, 2011
Birdfeeder? Planter? OR, maybe a candle chandy tutorial
We've all seen them, those cast off glass shades in various shapes, colors and styles. Sitting dejected and rejected on the shelves at the local thrift, or in a box of junk at the yard sale or flea market. I always look at them, and think I should do something with them, but end up leaving them behind...Until last week.
This glass shade beckoned to me from 2 aisles away, the color, the shape..it has this romantic Victorian, art deco, glam Hollywood vibe happening and I immediately thought..Ooh! I can use this to make a bird feeder for ourweed-bed flowerbed next to the porch, and hey, I should post a tute so that more of these can be saved and given new life.
So, ready?
We're going to start by gathering our supplies.
1. hanging light shade (mine was $2.92)
2. 24 gauge wire (Home depot) $5.50 ish
3. Jewels- I got mine at wally world, in the floral section For $3.00
4. Crystal beads- I used Darice brand from Joanns. $4 ish
Start by measuring out and cutting about 3 (or more/less depending on your shade) lengths of wire about 28" long.
Choose your crystal dangles and thread them on to the halfway point and bring the ends together so that the crystal is dangling.
Repeat for each wire strand and crystal dangle.
From this point on we will be threading both ends through each bead. There are no real instructions for this part, just 1 "rule" repeat the beading order on each of your wire strands. On mine I used 4 additional beads.
Thread the wire through one of the holes in your shade, continue beading, I used about 15 or so. Repeat for the other wire strands. At this point, you are going to bring all of your strands together. this is where buying the jewels comes in double handy, the round beads that come with the dangles have very large eyes, 6 strand of wire was fed through with no trouble at all.
I used 6 of the larger beads for this part. To finish the beading off, twist the strands together, then bend a loop over and wrap the ends around the twisted strands right at the top of the top bead, making sure to not leave any stray ends poking out. Hang and enjoy!
What do you all think?
This glass shade beckoned to me from 2 aisles away, the color, the shape..it has this romantic Victorian, art deco, glam Hollywood vibe happening and I immediately thought..Ooh! I can use this to make a bird feeder for our
So, ready?
We're going to start by gathering our supplies.
1. hanging light shade (mine was $2.92)
2. 24 gauge wire (Home depot) $5.50 ish
3. Jewels- I got mine at wally world, in the floral section For $3.00
4. Crystal beads- I used Darice brand from Joanns. $4 ish
Start by measuring out and cutting about 3 (or more/less depending on your shade) lengths of wire about 28" long.
Choose your crystal dangles and thread them on to the halfway point and bring the ends together so that the crystal is dangling.
Repeat for each wire strand and crystal dangle.
From this point on we will be threading both ends through each bead. There are no real instructions for this part, just 1 "rule" repeat the beading order on each of your wire strands. On mine I used 4 additional beads.
Thread the wire through one of the holes in your shade, continue beading, I used about 15 or so. Repeat for the other wire strands. At this point, you are going to bring all of your strands together. this is where buying the jewels comes in double handy, the round beads that come with the dangles have very large eyes, 6 strand of wire was fed through with no trouble at all.
I used 6 of the larger beads for this part. To finish the beading off, twist the strands together, then bend a loop over and wrap the ends around the twisted strands right at the top of the top bead, making sure to not leave any stray ends poking out. Hang and enjoy!
Isn't it pretty? Of course once I finished it I got to thinking, it's really too pretty to put away for the winter, how could I use it inside? And I am now flip flopping between a plant hanger and a LED candle holder..
What do you all think?
Wednesday, August 3, 2011
Quick Tutorial
While doing some blog reading a week or 2 ago I was reminded of a small inexpensive little doodad I had been meaning to order and found it at LaurieAnna's. The price was certainly right ($5.95) so I popped it in my cart and started to pay for it only to be disappointed..There is a $30 minimum to order online :(
3. Screw driver
4. Long screw (mine was a 2")
5. sand paper
6. saw to cut the dowel.
7. Unfinished wood plaque. I got mine at Hobby Lobby for $0.50 regular price.
2. Sand off the sharp edges of one end, creating a slightly rounded effect. This will be the top.
3. Drill your hole for the scissors. Find the center of your dowel and drill straight down. I just used my scissors to gauge when to stop.
4. Drill pilot holes. You will want to drill straight through the plaque, and about a half inch through the bottom of the dowel.

So I did a bit of searching, and found it on another website for $8.95, but with $6.00 shipping..um no. and found it again on eBay with a whopping $18.99 (free ship)price tag. Now, normally I would consider the $14.95 including shipping not bad, but after having been going to get it for half that price at LaurieAnna's if I'd had enough in my cart I just wan't going to go there. So, I made my own, and now I'm going to show you how I did it!
This literally took longer to gather the supplies into 1 spot than it did to make it!
What you will need:
1.A drill and drill bits (I used a 5/16 for the scissors hole, but would have used a larger one if we had it!)
2. a dowel rod (I bought 3/4" dowels, but discovered a scrap end of a 1" dowel from a previous project I ended up using..didn't have to cut the dowel down that way LOL)3. Screw driver
4. Long screw (mine was a 2")
5. sand paper
6. saw to cut the dowel.
7. Unfinished wood plaque. I got mine at Hobby Lobby for $0.50 regular price.
Steps:
1. Cut your dowel to 4.25"2. Sand off the sharp edges of one end, creating a slightly rounded effect. This will be the top.
3. Drill your hole for the scissors. Find the center of your dowel and drill straight down. I just used my scissors to gauge when to stop.
4. Drill pilot holes. You will want to drill straight through the plaque, and about a half inch through the bottom of the dowel.
5. assemble. From the bottom of the plaque, screw your screw through until the top 1/4" is showing on the top of the plaque. Twist your dowel onto this tip so that the screw grabs hold. Holding the dowel piece firmly finish screwing the 2 pieces together.
Place a spool of twine on the holder and insert your scissors in the hole and that's it, a nice little caddy that keeps your twine and scissors together neatly.
Subscribe to:
Posts (Atom)